Documenting objects dependencies of ETL processes is a tough task. Regardless it is SSIS, ADF, pipelines in Azure Synapse or other systems. The reasons for understanding the current solution can vary either: handover to other team/member of the team, troubleshooting, refactoring, debugging, investigating dependencies due to error, performance issue or others, as well as keen to remove selected/duplicated pipelines or logic.
But there is never a good time to make documentation, and even if that has been done - no one knows how much it’s up to date. The situation is not improved by the fact that quite often there is a lack of (free or built-in) tools for generating such documentation. Sounds familiar? I bet it does.
Wiki Markdown and Mermaid diagrams
If you ever work with Markdown, you know that it is more and more popular format to develop and share documentation, often as a part of the code repository. Most popular tools support the format, including Azure DevOps and GitHub. Markdown supports diagrams in a few different forms, hence one can enhance documentation with a handful sequence diagram, Gantt charts or flowcharts, simply by writing a few lines of plain text.

Generate diagram with PowerShell
It has been some time now since I released the first version of #adftools. The main reason behind the tool is to deploy Azure Data Factory directly from code. But as the name suggests - it is a toolkit. With the tool, you can very easily generate mermaid code and copy/paste it to your markdown file. What do we need to do?
- Install/import PowerShell module (if you haven’t done that yet)
- azure.datafactory.tools - for Azure Data Factory
- azure.synapse.tools - for Azure Synapse pipelines
- Download or clone the code onto a local machine
- Run one line of code in PowerShell
- Copy the result and paste it into the target .md (markdown) file
Let’s do all these steps together.
Install/import PowerShell module
Depending on which code of which service you want to discover - install and import one of the following PS modules:
$module = 'azure.synapse.tools'
Install-Module $module -Scope CurrentUser
Import-Module $module
Download or clone the code
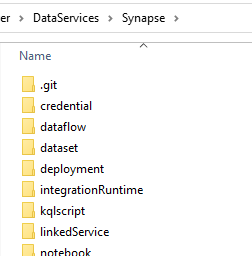
If you don’t have Git Integration set up for the pipelines - do it. I was explaining how to do that in this post, and once you achieve that - you can clone the code into your local machine. The folder should contain the structure of subfolders similar to this one:
Run one line of code in PowerShell
It’s time to run “the magic”. Execute the following code (either in Visual Studio Code or PowerShell ISE / session):
$RootFolder = "x:\!WORK\GitAz\sqlplayer\DataServices\Synapse"
$synapse = Import-SynapseFromFolder -RootFolder $RootFolder -SynapseWorkspaceName 'whatever'
Get-SynapseDocDiagram -synapse $synapse
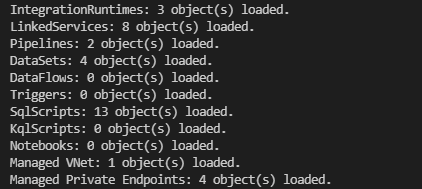
The first line is to set RootFolder variable with location of code. The second line (import) is going to read all files in subfolders. You’ll see similar result in output terminal:
The last line is to generate mermaid code for you:
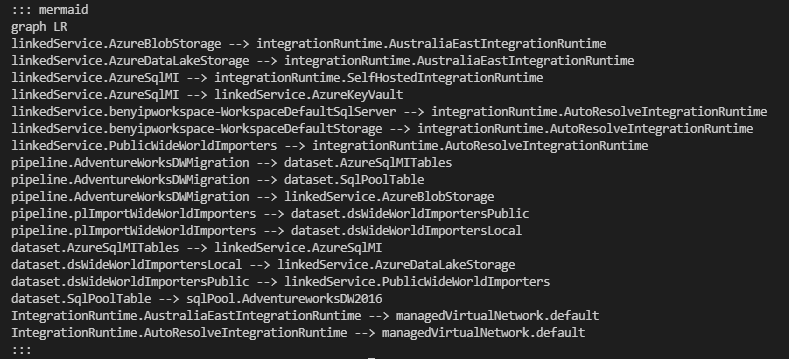 |
|---|
| Text representation of diagram |
Copy the result and paste it into the target .md (markdown) file
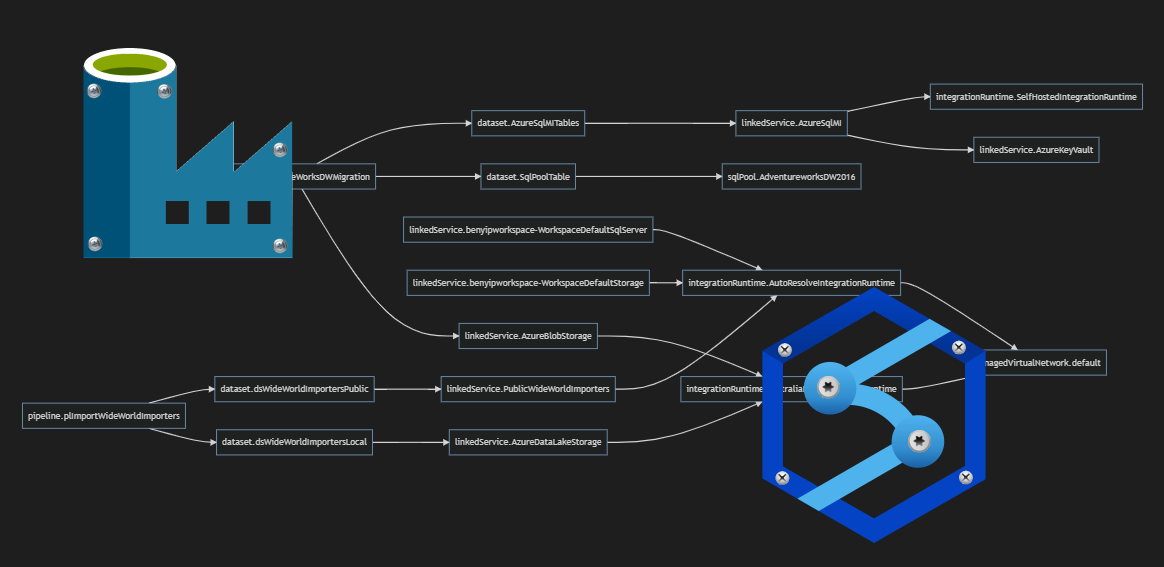
Now, simply copy & paste the result into the existing or newly created MarkDown file (.md extension) and you should be able to see the diagram, whenever in Visual Studio Code or using Azure DevOps:
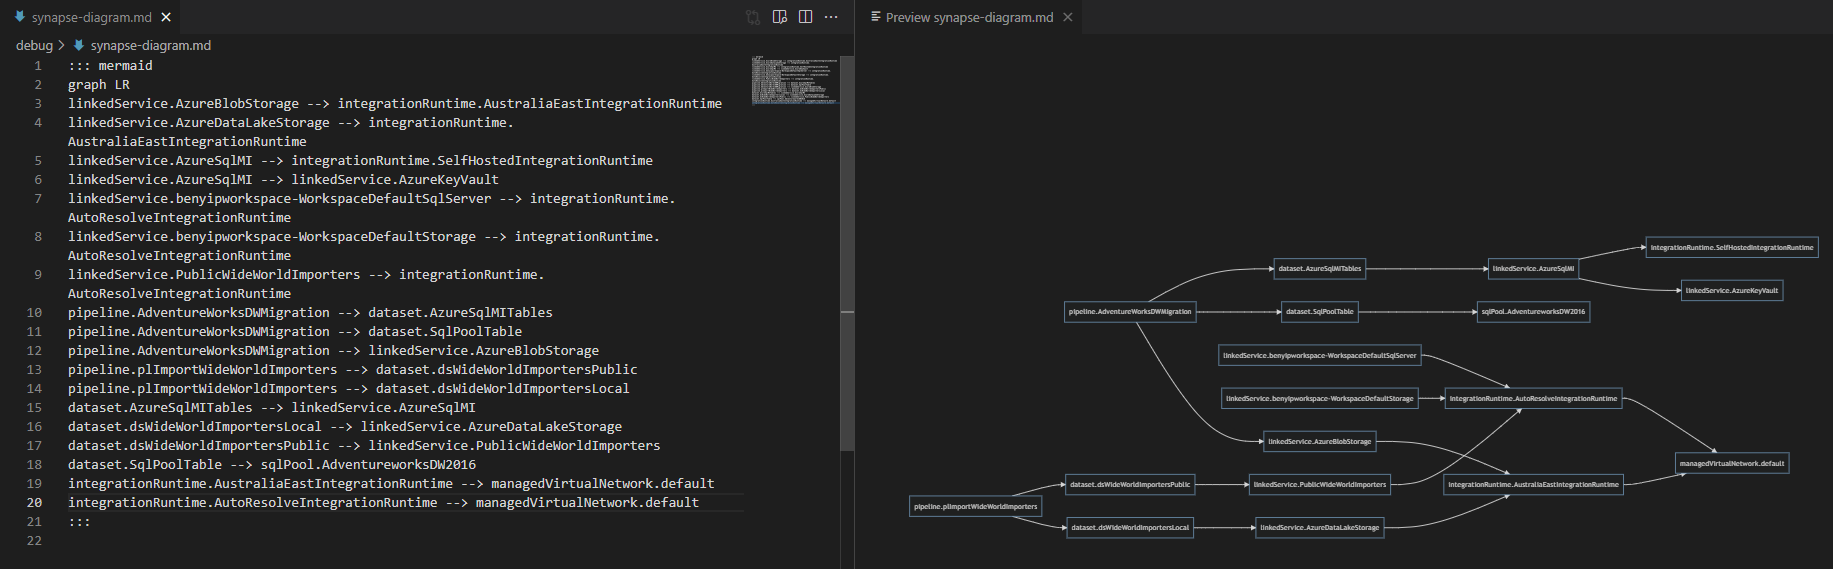 |
|---|
| Preview ‘diagram.md’ file in Visual Studio Code |
Alternatively, you can pass the output of the Get-SynapseDocDiagram command directly to a new file:
Get-SynapseDocDiagram -synapse $synapse | Set-Content -Path 'synapse-diagram.md'
Summary
I hope the command will be useful for you. As always, should you have any comments or suggestions for improvements, let me know: Raise an issue.
Thanks for reading.